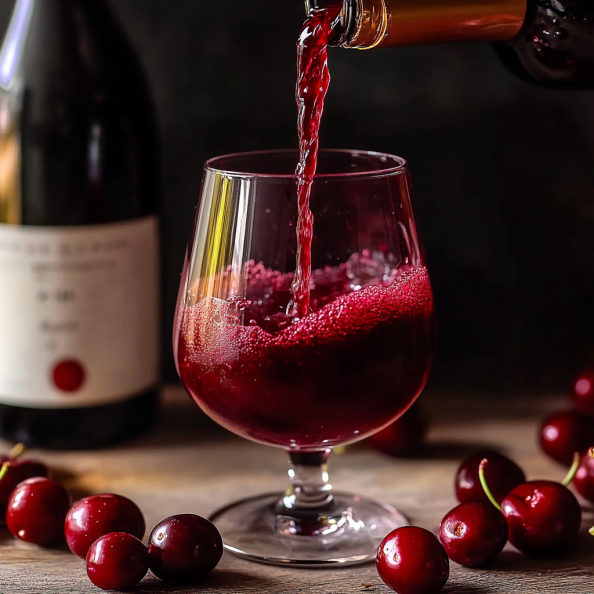
Making your own cherry wine at home is easier than you might think! This delightful, fruity wine is perfect for sipping on warm evenings or pairing with desserts. In this guide, we’ll walk you through a simple cherry wine recipe, including ingredient measurements, step-by-step instructions, and some handy alternatives to customize your homemade brew.
🍷 Why Make Your Own Cherry Wine?
Homemade cherry wine allows you to control the flavors, sweetness, and alcohol content. Whether you prefer a dry or sweet wine, this recipe can be adjusted to suit your taste. Plus, it’s a great way to preserve fresh cherries when they’re in season!
🛒 Ingredients for Cherry Wine
To make approximately 1 gallon (4 liters) of cherry wine, you’ll need:
- 4 lbs (1.8 kg) fresh cherries (sweet or tart)
- 2.5 lbs (1.1 kg) sugar (adjust based on sweetness preference)
- 1 gallon (3.8 liters) filtered water
- 1 tsp pectic enzyme (helps break down fruit for better fermentation)
- 1 tsp yeast nutrient (aids yeast growth)
- 1 packet wine yeast (Lalvin EC-1118 or any wine yeast)
- 1 Campden tablet (optional, sterilizes the must)
- 1 tsp acid blend (for balanced acidity)
🍒 Ingredient Alternatives
- Cherries: You can use frozen cherries if fresh ones aren’t available.
- Sugar: Swap white sugar with honey for a mead-like flavor.
- Yeast: If wine yeast isn’t available, you can try champagne yeast for a crisp finish.
How to Make Cherry Wine?
1. Preparing the Cherries
- Wash the cherries thoroughly.
- Remove stems and pits to avoid bitterness.
- Mash or crush the cherries in a sanitized container to release the juice.
2. Making the Must (Fermentation Base)
- In a large fermenting bucket, mix the crushed cherries, sugar, and water.
- Stir well until sugar is dissolved.
- Add the pectic enzyme, yeast nutrient, and acid blend.
- Cover the bucket with a clean cloth and let it sit for 12 hours.
- After 12 hours, crush a Campden tablet (optional) and stir it in to prevent bacteria and wild yeast.
3. Fermentation Process
- After 24 hours, add the wine yeast and stir gently.
- Cover loosely to allow airflow and let it ferment for 5-7 days at room temperature.
- Stir once daily to keep the yeast active.
4. Transferring to Secondary Fermentation
- After a week, strain the liquid using a fine mesh or cheesecloth.
- Transfer the liquid into a sanitized glass carboy, leaving 1-2 inches of space at the top.
- Attach an airlock to the carboy.
5. Aging the Cherry Wine
- Let the wine ferment for 4-6 weeks in a cool, dark place.
- Siphon (rack) the wine into a clean carboy every 4-6 weeks to remove sediment.
- After 3-6 months, bottle the wine and let it age for another 3-12 months for best flavor.
🍷 Serving and Enjoying Your Cherry Wine
- Serve chilled in a wine glass.
- Pairs well with dark chocolate, cheese, or grilled meats.
- For a sparkling version, carbonate the wine before bottling.
Final Thoughts on Cherry Wine Recipe
Making your own cherry wine at home is a rewarding and flavorful journey. With just a few simple ingredients and a little patience, you can create a rich, vibrant wine that captures the sweet-tart essence of fresh cherries. Whether you’re crafting a bottle for yourself or to share with friends and family, the satisfaction of sipping something homemade is unmatched. So, give it a try—your taste buds (and future self) will thank you. Cheers to your winemaking adventure!
Homemade Cherry Wine Recipe: A Step-by-Step Guide
"Turn fresh cherries into delicious homemade wine with this easy, foolproof cherry wine recipe! No fancy equipment needed—just bold flavor, simple steps, and amazing results."

Ingredients
4 lbs (1.8 kg) fresh cherries (sweet or tart)
Instructions
-
Wash the cherries thoroughly.
-
Remove stems and pits to avoid bitterness.
-
Mash or crush the cherries in a sanitized container to release the juice.
-
In a large fermenting bucket, mix the crushed cherries, sugar, and water.
-
Stir well until sugar is dissolved.
-
Add the pectic enzyme, yeast nutrient, and acid blend.
-
Cover the bucket with a clean cloth and let it sit for 12 hours.
-
After 12 hours, crush a Campden tablet (optional) and stir it in to prevent bacteria and wild yeast.
-
After 24 hours, add the wine yeast and stir gently.
-
Cover loosely to allow airflow and let it ferment for 5-7 days at room temperature.
-
Stir once daily to keep the yeast active.
-
After a week, strain the liquid using a fine mesh or cheesecloth.
-
Transfer the liquid into a sanitized glass carboy, leaving 1-2 inches of space at the top.
-
Attach an airlock to the carboy.
-
Let the wine ferment for 4-6 weeks in a cool, dark place.
-
Siphon (rack) the wine into a clean carboy every 4-6 weeks to remove sediment.
-
After 3-6 months, bottle the wine and let it age for another 3-12 months for best flavor.
-
🍷 Serving and Enjoying Your Cherry Wine
Nutrition Facts
Serving Size 1
- Amount Per Serving
- Calories 120kcal
- % Daily Value *
- Total Carbohydrate 4g2%
- Sugars 3g
* Percent Daily Values are based on a 2,000 calorie diet. Your daily value may be higher or lower depending on your calorie needs.


