
The first time I tasted Pinsa Romana, I was walking through the charming cobblestone streets of Rome. A local bakery, its aroma wafting through the air, drew me in. What I discovered was a pizza-like delight with a light, crispy crust and a rich, flavorful topping. Unlike traditional pizza, pinsa is made with a unique blend of flours, resulting in an airy yet crunchy base. Now, I’m bringing this authentic Pinsa Recipe to your kitchen so you can enjoy this Roman specialty anytime!
Why You’ll Love This Pinsa Recipe
- Healthier Alternative – Lower in gluten and made with a mix of flours for easier digestion.
- Crispy Yet Airy – The long fermentation process results in a crunchy crust with a pillowy inside.
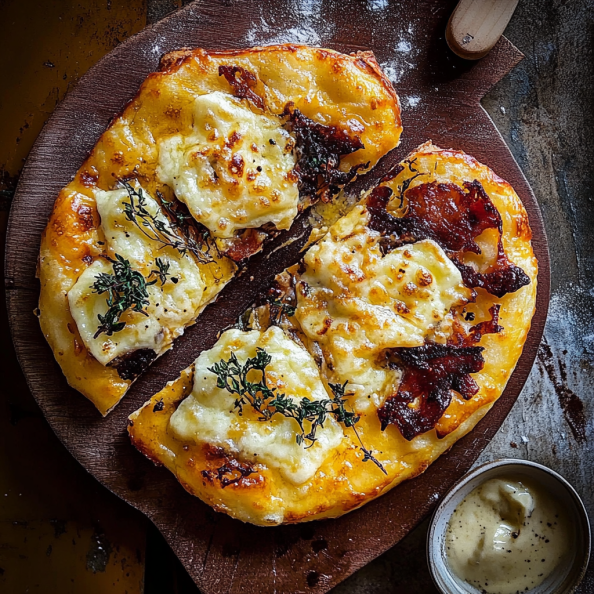
- Customizable Toppings – From classic Margherita to prosciutto and arugula, you can make it your own.
- Easy to Make – While it requires some resting time, the actual prep is simple and rewarding.
Ingredients for Pinsa Recipe
For the Dough:
- 2 cups (250g) all-purpose flour
- 1 cup (120g) rice flour
- 1/2 cup (60g) soy flour
- 1 teaspoon salt
- 1 teaspoon dry yeast
- 1 1/4 cups (300ml) cold water
- 1 tablespoon olive oil
For the Toppings (Classic Pinsa Margherita):
- 1/2 cup crushed tomatoes
- 1 teaspoon oregano
- 1/2 teaspoon salt
- 1 cup mozzarella cheese, shredded
- 4–5 fresh basil leaves
- 1 tablespoon extra virgin olive oil
How to Make Pinsa?
1. Prepare the Dough
In a large bowl, mix the flours and salt. Dissolve the yeast in cold water, then gradually add it to the flour mixture. Knead the dough for about 10 minutes, then add olive oil and knead until smooth.
2. Cold Fermentation
Cover the dough with plastic wrap and refrigerate for 24–48 hours. This slow fermentation enhances the flavor and texture.
3. Shape the Pinsa
Take the dough out and let it rest at room temperature for 2 hours. Preheat your oven to 475°F (245°C). Stretch the dough into an oval shape, about 1/2 inch thick, using your hands (avoid rolling pins for a rustic texture).
4. Pre-Bake the Crust
Place the dough on a parchment-lined baking sheet and bake for 5–7 minutes until slightly crisp.
5. Add Toppings & Bake
Spread crushed tomatoes over the crust, sprinkle salt and oregano, and top with mozzarella. Bake for another 5–7 minutes until golden and bubbly.
6. Finish & Serve
Drizzle with olive oil, add fresh basil leaves, and serve hot!
Pro Tips for Perfect Pinsa
- Use cold water for the dough to slow down yeast activation and enhance texture.
- Let the dough ferment for at least 24 hours to develop deep flavors.
- Pre-bake the crust before adding toppings to ensure crispiness.
- Avoid rolling pins, as stretching by hand creates the best texture.
- Use high-heat baking (475°F) to mimic a wood-fired oven effect.
Final Thought on Pinsa Recipe
This Pinsa Recipe is a game-changer for any pizza lover looking for a lighter, crispier alternative. Whether you stick to the classic Margherita or explore unique toppings, pinsa will become a new favorite in your kitchen. Try it today and experience the flavors of Rome at home!
The Ultimate Pinsa Recipe – Crispy, Airy, and Delicious
Ingredients
For the Dough:
Instructions
-
In a large bowl, mix the flours and salt. Dissolve the yeast in cold water, then gradually add it to the flour mixture. Knead the dough for about 10 minutes, then add olive oil and knead until smooth.
-
Cover the dough with plastic wrap and refrigerate for 24–48 hours. This slow fermentation enhances the flavor and texture.
-
Take the dough out and let it rest at room temperature for 2 hours.
-
Preheat your oven to 475°F (245°C). Stretch the dough into an oval shape, about 1/2 inch thick, using your hands.
-
Place the dough on a parchment-lined baking sheet and bake for 5–7 minutes until slightly crisp
-
Spread crushed tomatoes over the crust, sprinkle salt and oregano, and top with mozzarella. Bake for another 5–7 minutes until golden and bubbly.
-
Finish & Serve
Nutrition Facts
Servings 3
- Amount Per Serving
- Calories 220kcal
- % Daily Value *
- Total Fat 5g8%
- Total Carbohydrate 28g10%
- Dietary Fiber 3g12%
- Sugars 2g
- Protein 8g16%
* Percent Daily Values are based on a 2,000 calorie diet. Your daily value may be higher or lower depending on your calorie needs.
