Growing up, my grandmother always had a jar of homemade lemon curd sitting in the fridge, ready to be spread over warm toast or swirled into yogurt. The first time I made it myself, I followed Mary Berry’s Lemon Curd Recipe, and the results were nothing short of magical—smooth, creamy, and bursting with citrusy goodness. Today, I want to share this classic recipe so you can enjoy its tangy sweetness just like I did.
Why You’ll Love This Mary Berry Lemon Curd Recipe
- Incredibly Fresh & Zesty – The vibrant lemon flavor shines through in every spoonful.
- Easy to Make – With just a few ingredients, you can whip up a homemade curd in no time.
- Versatile – Use it as a spread, a filling for pastries, or even a topping for cheesecakes.
- No Preservatives – Unlike store-bought versions, this curd is made with all-natural ingredients.
Ingredients You’ll Need
- 4 large eggs
- 2 large lemons, zest and juice
- 1 cup (200g) granulated sugar
- 1/2 cup (115g) unsalted butter, cubed
Instructions For Mary Berry’s Lemon Curd Recipe
1. Prepare a Bain-Marie
Fill a saucepan with an inch of water and bring it to a gentle simmer. Place a heatproof bowl over the pan, ensuring it doesn’t touch the water.
2. Whisk the Ingredients
In the bowl, whisk together the eggs, sugar, lemon juice, and lemon zest until fully combined.
3. Cook Until Thickened
Stir constantly over low heat for about 10–15 minutes, or until the mixture thickens and coats the back of a spoon.
4. Add Butter
Remove from heat and gradually stir in the butter until melted and smooth.
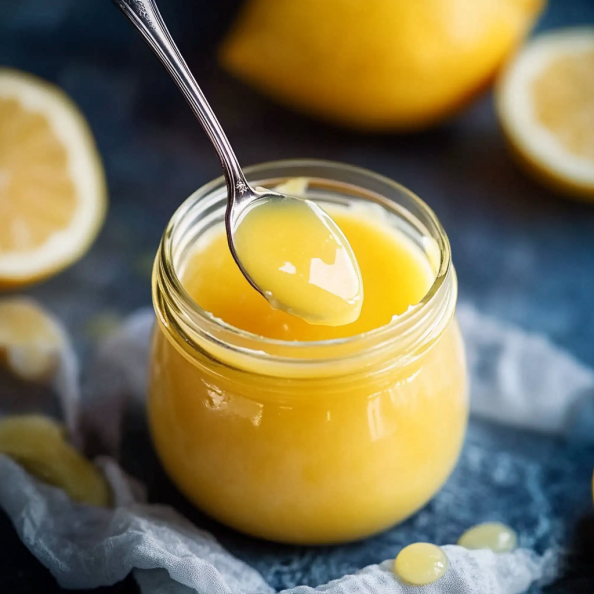
5. Strain & Store
Strain the curd through a fine-mesh sieve to remove any lumps, then transfer it to sterilized jars.
6. Chill & Enjoy
Allow the curd to cool before refrigerating. It will continue to thicken as it sets.
Nutritional Facts (Per Serving)
- Calories: 120
- Protein: 2g
- Carbohydrates: 15g
- Fat: 6g
- Sugar: 14g
- Fiber: 0.5g
FAQ
1. How long does homemade lemon curd last?
Stored in an airtight jar in the refrigerator, it lasts for up to 2 weeks.
2. Can I freeze lemon curd?
Yes! Store it in a freezer-safe container for up to 3 months. Thaw in the fridge before use.
3. Why did my lemon curd turn out lumpy?
This can happen if the heat is too high or if the eggs are not whisked continuously. Straining the curd will help remove any lumps.
4. Can I make lemon curd without eggs?
Yes! Substitute eggs with cornstarch for a vegan version, though the texture will differ.
5. What can I use lemon curd for?
Spread it on toast, scones, pancakes, use it as a cake filling, or drizzle it over ice cream.
Pro Tips for Perfect Lemon Curd
- Use Fresh Lemons – Bottled lemon juice won’t give the same fresh, zesty flavor.
- Whisk Constantly – This prevents the eggs from scrambling and ensures a smooth texture.
- Low & Slow Cooking – Avoid high heat to prevent curdling.
- Strain the Curd – For an ultra-smooth finish, pass it through a sieve before storing.
Image Prompts for MidJourney
- A jar of homemade lemon curd with a spoonful drizzling down the side.
- A slice of cake topped with a generous layer of lemon curd.
- A breakfast table setting featuring toast, lemon curd, and a cup of tea.
- A close-up shot of a spoon stirring the glossy, rich lemon curd.
Final Thought on Mary Berry’s Lemon Curd Recipe
Homemade Mary Berry’s Lemon Curd Recipe is a treat that elevates any meal with its bright and citrusy charm. Try making it yourself, and let me know how you enjoy this delightful spread!
Cuisine & Course
This Mary Berry Lemon Curd Recipe is a staple in British cuisine, known for its luscious, velvety texture and bright flavor. It is typically used as a spread, filling, or dessert topping, making it perfect for breakfast, afternoon tea, or even as a sweet accompaniment to cakes and pastries.
Mary Berry Lemon Curd Recipe – A Zesty Delight for All Occasions

Ingredients
Instructions
-
Rinse and sort the kidney beans. Soak the beans in a large pot of water for at least 8 hours, or overnight.
-
Drain and rinse the beans. Place them in a large pot and cover with water. Bring to a boil, then reduce the heat to a simmer and cook for 1 hour, or until the beans are tender.
-
Preheat the oven to 375°F (190°C).
-
Heat the olive oil in a large skillet over medium heat. Add the onion ????, bell pepper, and garlic ????, and cook for 5 minutes, or until the vegetables are tender.
-
Add the oregano, basil, salt, and black pepper, and stir to combine.
-
Add the tomato sauce and cooked beans to the skillet and stir to combine.
-
Spread the bean mixture in an even layer on a baking sheet. Sprinkle the vegan cheese shreds and vegan parmesan cheese on top.
-
Bake for 10-15 minutes, or until the cheese is melted and bubbly.
-
Serve hot and enjoy!
Nutrition Facts
Servings 1
Serving Size 1
- Amount Per Serving
- Calories 386kcal
- % Daily Value *
- Total Fat 16.7g26%
- Saturated Fat 2.4g12%
- Total Carbohydrate 56.5g19%
- Sugars 7.5g
- Protein 18.2g37%
- Vitamin A 302 IU
- Vitamin C 12 mg
- Calcium 135 mg
- Iron 7 mg
* Percent Daily Values are based on a 2,000 calorie diet. Your daily value may be higher or lower depending on your calorie needs.