
Baking has always been a tradition in my family. I remember the warm aroma of vanilla and cocoa filling the kitchen as my grandmother carefully mixed batter for cupcakes. But as I grew older and developed a dairy sensitivity, I thought my days of enjoying fluffy, moist cupcakes were over—until I discovered the magic of dairy-free baking.
This dairy-free cupcake recipe is a game-changer for those who love desserts but need to avoid dairy. With simple substitutions, you still get a rich, soft, and flavorful cupcake that no one will believe is dairy-free. Whether you’re lactose-intolerant, vegan, or just looking for a healthier treat, these cupcakes will satisfy your
Ingredients for Dairy-Free Cupcakes
These dairy-free cupcakes use plant-based alternatives to create a fluffy texture and delicious taste.
Dry Ingredients
- 1 ¾ cups all-purpose flour (or gluten-free flour blend for a GF option)
- ¾ cup granulated sugar (or coconut sugar for a natural alternative)
- 1 ½ teaspoons baking powder
- ½ teaspoon baking soda
- ¼ teaspoon salt
Wet Ingredients
- ½ cup unsweetened applesauce (or mashed banana for a fruity twist)
- ½ cup plant-based milk (almond, oat, soy, or coconut milk)
- ⅓ cup coconut oil (or vegetable oil)
- 1 tablespoon apple cider vinegar (helps with leavening)
- 1 teaspoon vanilla extract
Optional Additions
- ½ cup dairy-free chocolate chips
- 1 teaspoon cinnamon for warmth
- ¼ cup chopped nuts for crunch
Instructions to make Dairy-Free Cupcakes
Step 1: Preheat and Prepare
- Preheat your oven to 350°F (175°C).
- Line a muffin tin with cupcake liners.
Step 2: Mix the Dry Ingredients
- In a large bowl, whisk together flour, sugar, baking powder, baking soda, and salt.
Step 3: Mix the Wet Ingredients
- In a separate bowl, combine applesauce, plant-based milk, coconut oil, apple cider vinegar, and vanilla extract.
- Stir until smooth and well combined.
Step 4: Combine and Mix
- Slowly pour the wet mixture into the dry ingredients, stirring gently.
- Mix until just combined—do not overmix!
- Fold in dairy-free chocolate chips or nuts if using.
Step 5: Bake
- Spoon the batter into the cupcake liners, filling each about ¾ full.
- Bake for 18-22 minutes, or until a toothpick inserted in the center comes out clean.
- Let the cupcakes cool in the pan for 5 minutes, then transfer them to a wire rack.
Step 6: Frost and Serve
- Top with dairy-free frosting (recipe below) or enjoy as is!
Dairy-Free Frosting Recipe
Ingredients
- ½ cup vegan butter or solid coconut oil
- 2 cups powdered sugar
- 2 tablespoons plant-based milk
- 1 teaspoon vanilla extract
- 1 tablespoon cocoa powder (for chocolate frosting)
Instructions
- Beat the vegan butter until smooth.
- Slowly add powdered sugar and mix well.
- Pour in plant-based milk and vanilla extract, whipping until creamy.
- For chocolate frosting, mix in cocoa powder.
- Spread or pipe onto cooled cupcakes.
Final Thoughts
This dairy-free cupcake recipe proves that you don’t need dairy to create a rich, moist, and delicious dessert. With simple swaps, you can enjoy these cupcakes without compromising on taste or texture. Whether you’re baking for a special occasion or just craving a sweet treat, these cupcakes are sure to be a hit!
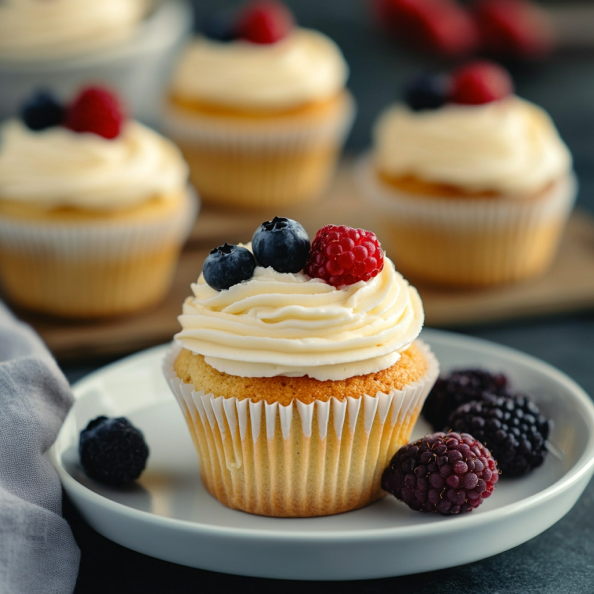
Dairy-Free Cupcake Recipe: Light, Fluffy, and Irresistible
Cheesy Vegan Pizza Beans is a delicious and satisfying vegan dish that is perfect for a quick dinner or a satisfying snack. Made with kidney beans, tomato sauce, and vegan cheese, this dish is packed with protein and flavor.
Ingredients
Dry Ingredients
Instructions
-
Preheat your oven to 350°F (175°C).
-
Line a muffin tin with cupcake liners.
-
In a large bowl, whisk together flour, sugar, baking powder, baking soda, and salt.
-
In a separate bowl, combine applesauce, plant-based milk, coconut oil, apple cider vinegar, and vanilla extract.
-
Stir until smooth and well combined.
-
Slowly pour the wet mixture into the dry ingredients, stirring gently.
-
Mix until just combined—do not overmix!
-
Fold in dairy-free chocolate chips or nuts if using.
-
Spoon the batter into the cupcake liners, filling each about ¾ full.
-
Bake for 18-22 minutes, or until a toothpick inserted in the center comes out clean.
-
Let the cupcakes cool in the pan for 5 minutes, then transfer them to a wire rack.
-
Top with dairy-free frosting or enjoy as is!

Nutrition Facts
Servings 1
Serving Size 1
- Amount Per Serving
- Calories 160kcal
- % Daily Value *
- Total Fat 7g11%
- Total Carbohydrate 25g9%
- Dietary Fiber 1g4%
- Sugars 12g
- Protein 2g4%
* Percent Daily Values are based on a 2,000 calorie diet. Your daily value may be higher or lower depending on your calorie needs.
Note
You can also use other types of beans in this recipe, such as black beans or pinto beans.
Feel free to get creative and add your favorite pizza toppings to the mix!
